To enable Neo Agent to interact with your HaloPSA system programmatically, you need to create a dedicated API application with proper authentication credentials and permissions.Documentation Index
Fetch the complete documentation index at: https://docs.neoagent.io/llms.txt
Use this file to discover all available pages before exploring further.
How Neo Agent Permissions Work
Neo Agent uses two layers of access control to keep your HaloPSA data safe:- HaloPSA API Application (what you configure here) — sets the maximum API access available via OAuth scopes and the associated agent resource.
- Neo Agent Dashboard — where you choose exactly what Neo can do. You configure permission groups that control which areas Neo can read, write, or ignore — and whether actions require technician approval first.
Creating the API Application
Navigate to API Applications
Go to Configuration → Integrations → HaloPSA API, then click View Applications to see the applications list.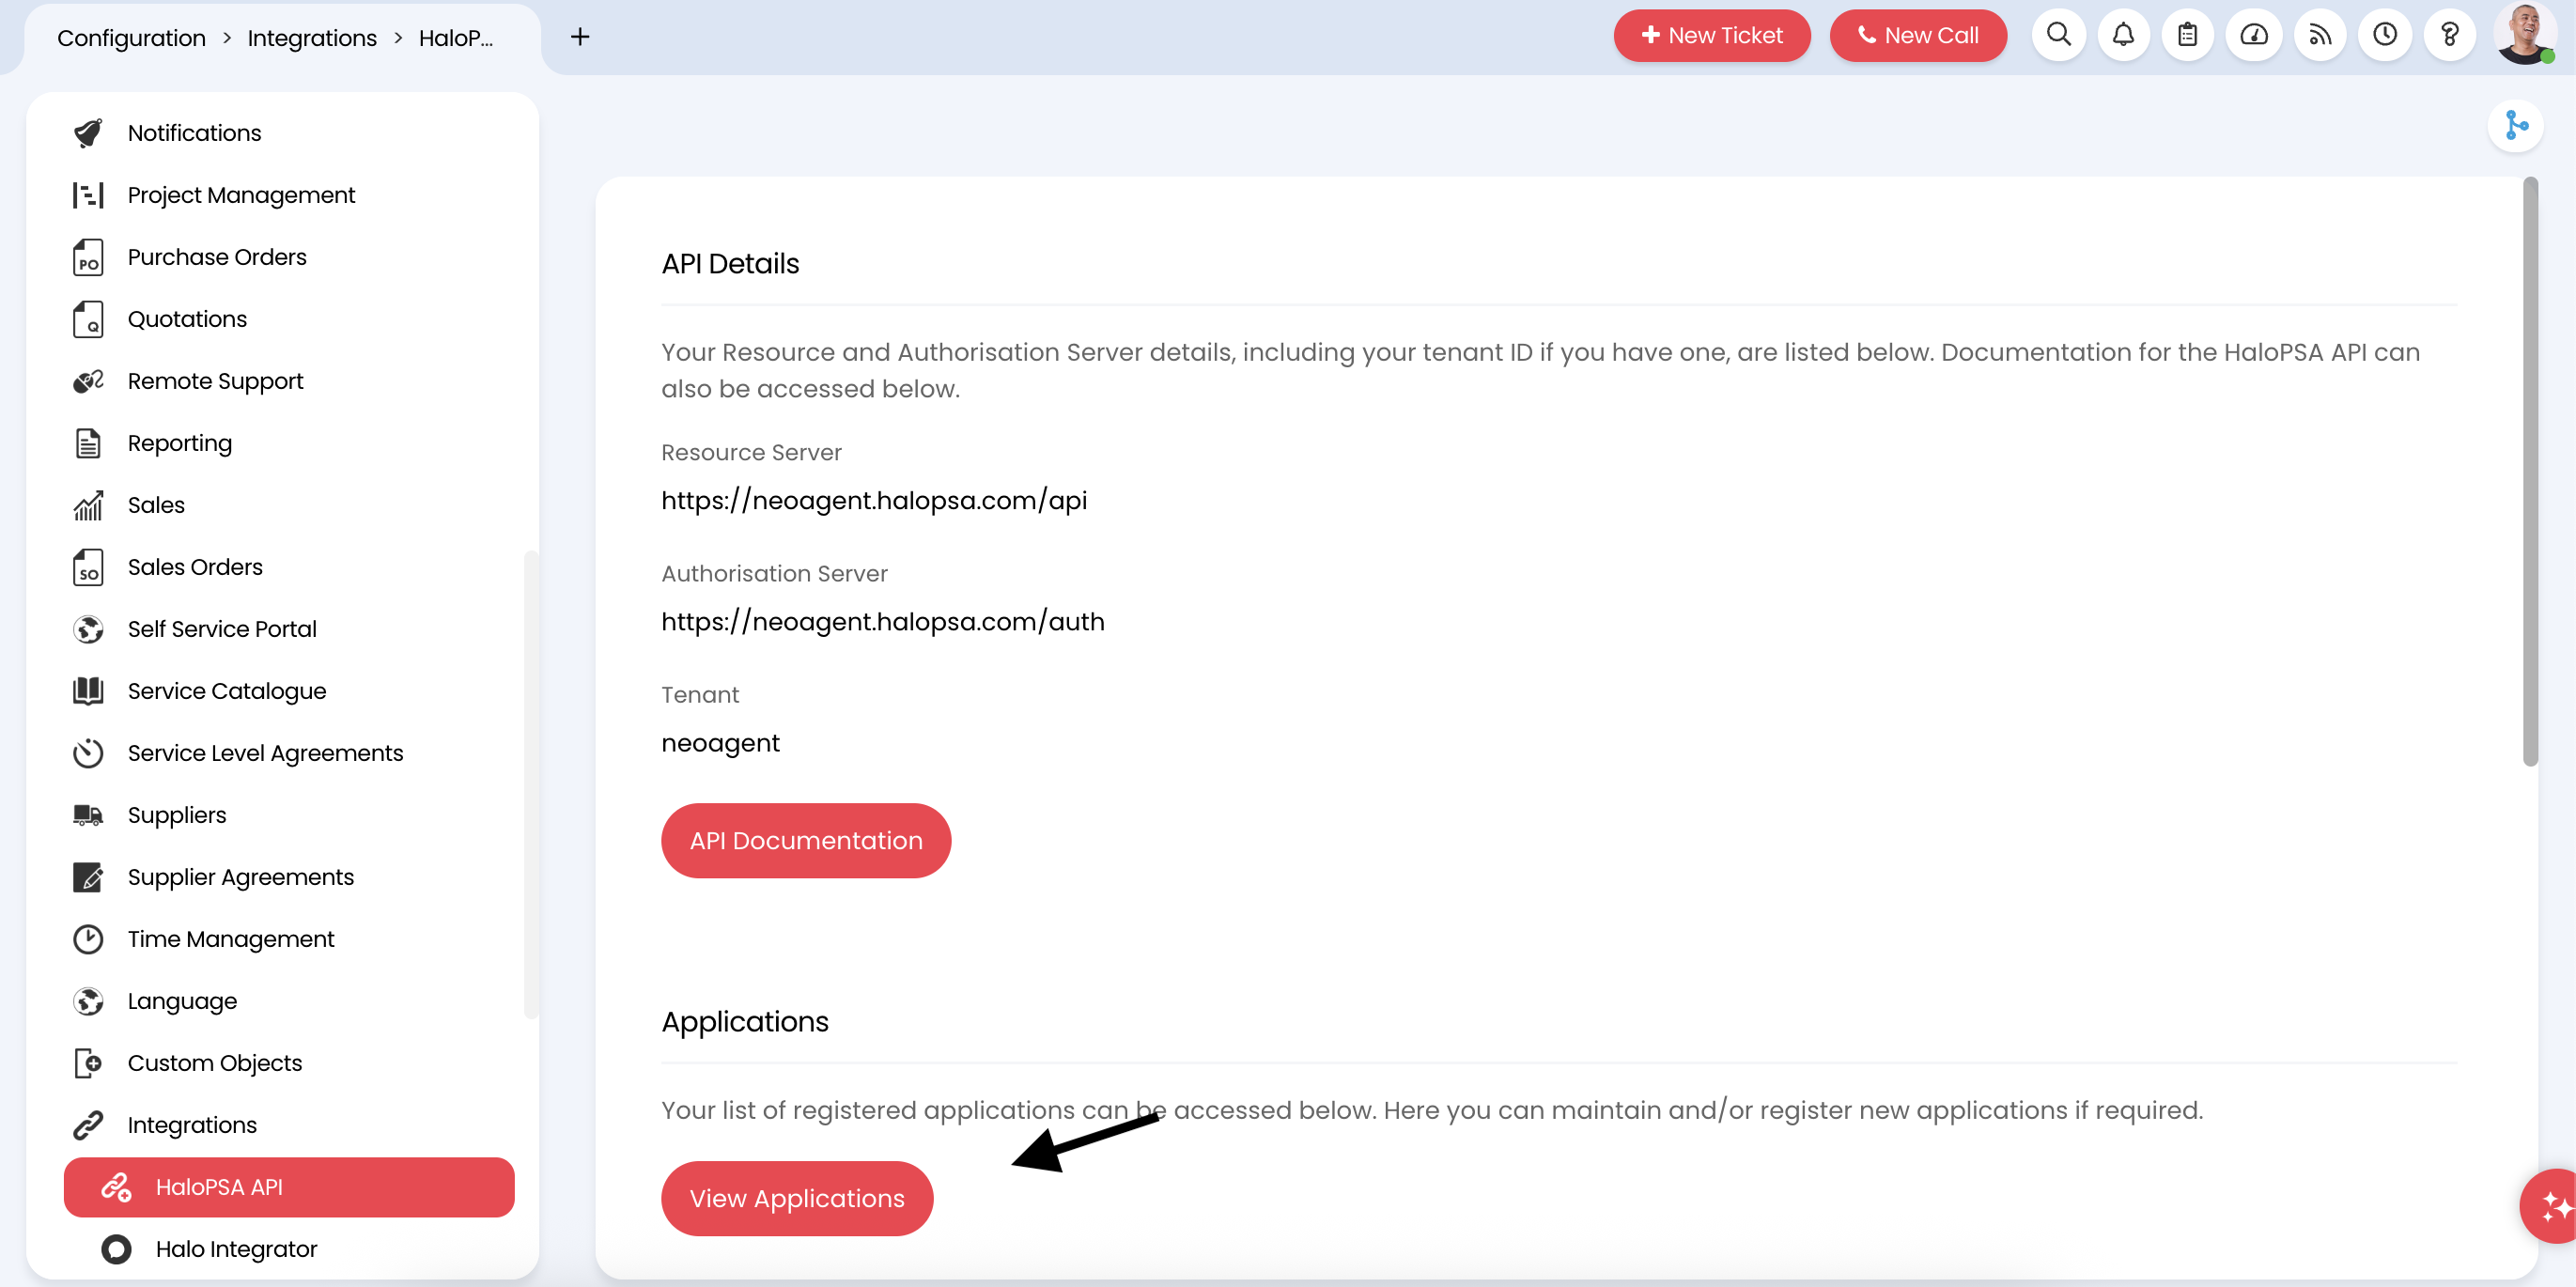
Configure application details
Fill in the basic information for the new API application: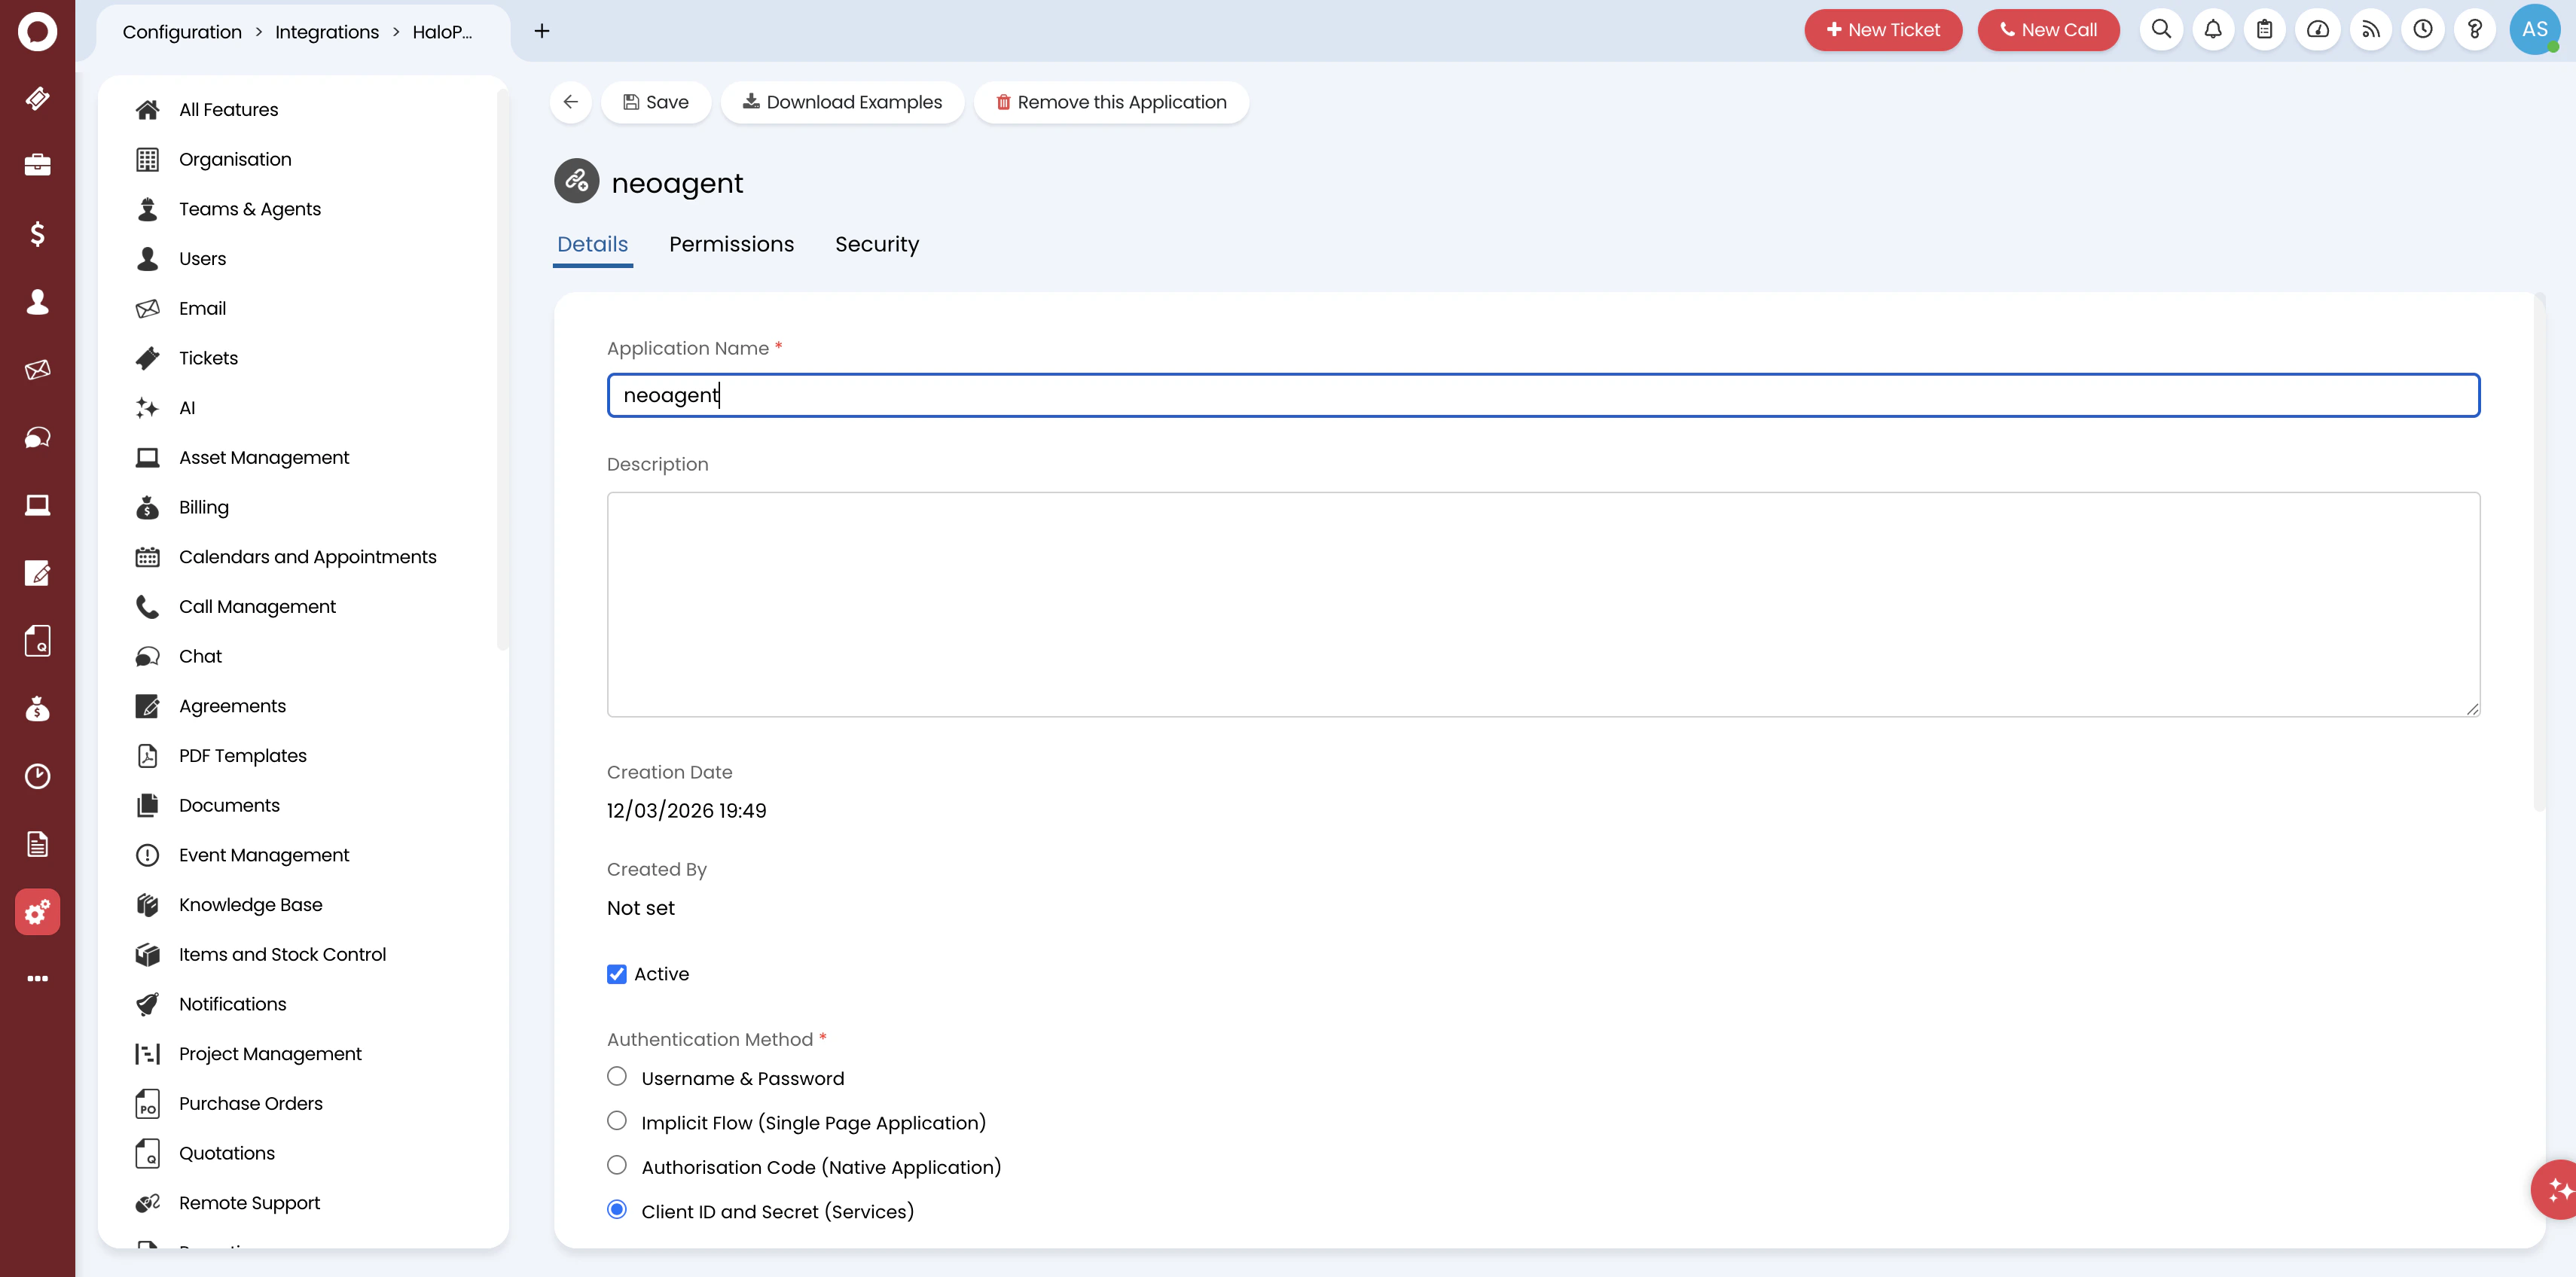
- Application Name: Enter
neoagentor a descriptive name likeNeo Agent Integration - Active: Ensure this is checked
- Authentication Method: Select Client ID and Secret (Services) for secure server-to-server API authentication
Configure permissions (OAuth scopes)
Click the Permissions tab. Select the all:standard scope to grant comprehensive API access.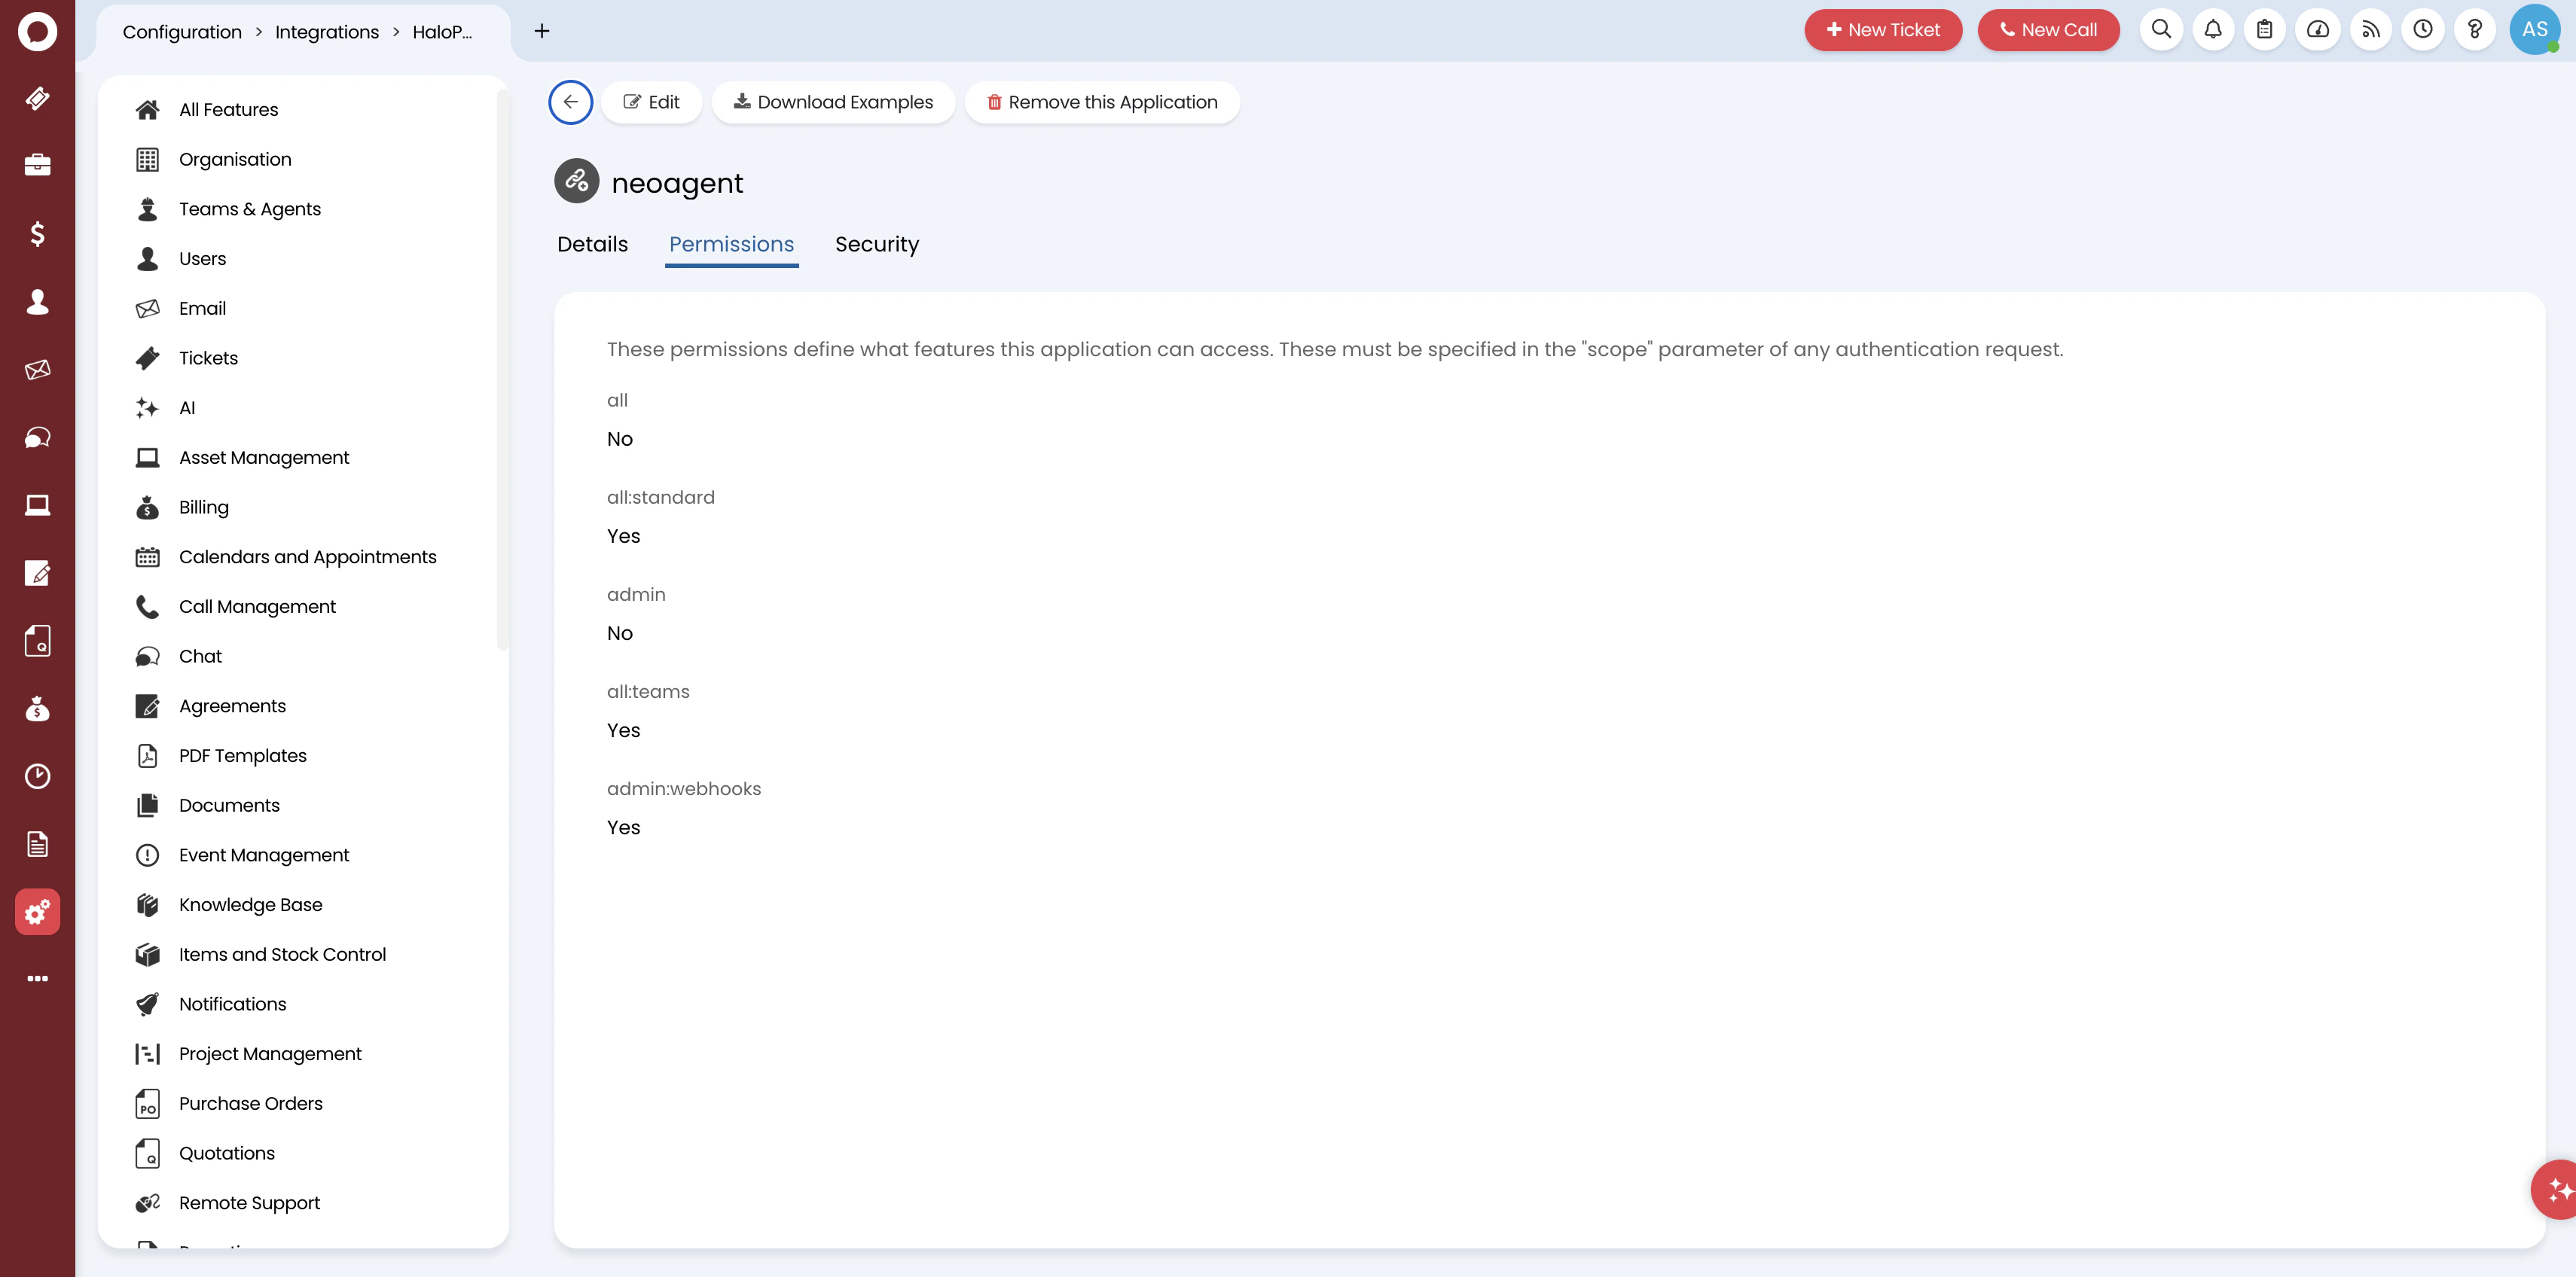
HaloPSA uses coarse OAuth scopes — the all:standard scope is needed because there is no way to grant read access to some areas and write access to others at the API level. Fine-grained control happens in the Neo Agent dashboard, where you configure exactly which areas Neo can read, write, or ignore.
What Neo Agent accesses
Neo Agent writes to: tickets, actions (notes/time entries), contacts, assets, products, and appointments.Neo Agent reads only: companies, SLAs, knowledge base, contracts, invoices, quotations, suppliers, opportunities, reports, and system configuration.Save and generate credentials
Click Save. After saving, you’ll see the application’s authentication credentials:
- Client ID: A unique identifier for your application
- Client Secret: A secure secret key for authentication (shown as dots — copy it when first generated)
Make note of the following information for the Neo Agent integration setup:
- Client ID
- Client Secret
- Your HaloPSA base URL (e.g.,
https://yourdomain.halopsa.com) - The Agent ID from the previous step
What’s Next?
Once you’ve created the API application, you’re ready to connect HaloPSA to Neo Agent using:- The Client ID from your API application
- The Client Secret from your API application
- Your HaloPSA base URL
- The Agent ID for impersonation
Before proceeding, verify:
- Application name is set and status is Active
- Authentication method is Client ID and Secret (Services)
- Permissions: all:standard scope is enabled
- Client ID and Client Secret are saved securely